What You'll Need
1 x 4 x 6 #2 & Better Kiln Dried Whitewood Board S4S x 10
7/16 in. x 4 ft. x 8 ft. OSB Sheathing
Minwax 22240 Wood Finish Interior Wood Stain, Special Walnut, 1/2-Pint
Minwax 22718 1/2 Pint Wood Finish Interior Wood Stain, Ebony
Dirty Sock/Rag
1 1/4 long screws x 36
Wood Glue
Large D Rings x 2
World's Strongest Picture Hanger
PPE (Personal Protective Equipment)
How Long It Takes
It's a weekend project. Cutting the wood is quick, but measuring out the angles and distances was a bear. Then there's dry time to account for with the stain.
Rustic Wall Art Tutorial
To Start, Hubby cut across the shortest length of the plywood 40 inches in then in half. We had 2 pieces that were 40 by 24 inches. This is the base in which our whitewood board will be adhered to.
I then found the center of each of the 10 boards. The top and bottom boards did not need any cuts- Yay! For 2 boards, I started from that center point, measured out 12 inches left and right and marked. Another 2 boards measured out 18 inches from the center and marked. Another 2 boards and measured out 24 inches. The last 2 boards measured out 30 inches. Hubby cut 45 degree angles at those marks (Or at least the best we could, I did use an old school protractor for this but we were working with a flaky circular saw and many cuts were not perfect).
Next I stained the outer boards the darker stain. And the inner ones, I stained the lighter color. I then allowed them to dry. (It seemed tempting to skip the wait but I didn't want to transfer the stain accidentally.)
The next step was to lay the boards on a level surface and wood glue them in place. I would recommend using something to securely clamp them in place while the glue dries if you attempt this project. At the time, we didn't own any clamps so I used weights but I don't recommend it.
Once dried, hubby reinforced the boards with the 1 1/4 inch screws. He then attached the large D rings to the backs. We then ensured our heavy duty, ultra heavy load picture hanging hardware was installed correctly.
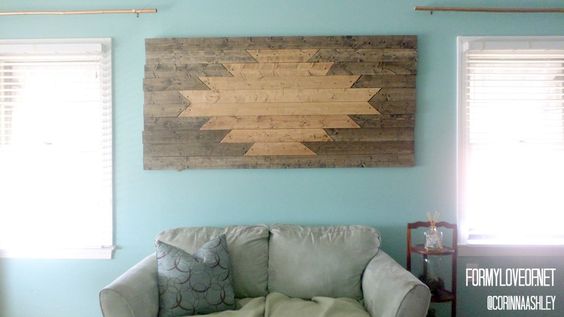
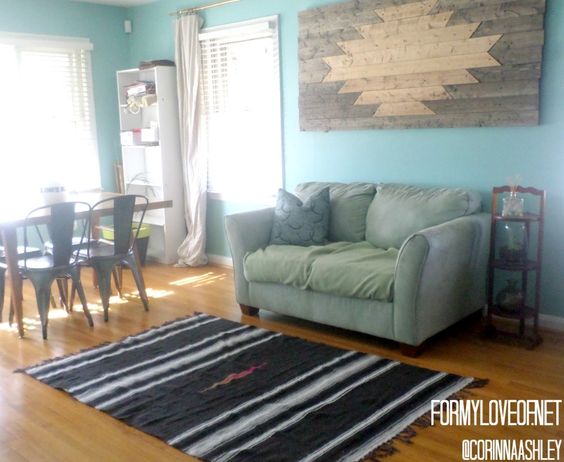
I could hardly contain myself when we got it up on the wall. I had to Instagram it immediately. Ha. I promise, things look much better there these days!
So creating a rustic and massive piece of art wasn't all that difficult. It's way cooler than something I would've picked up from any store and it was fun getting it created with my husband's help. Granted, I have since taken it down. And it sits in our garage. But, I do love it and am always looking for a new place to hang it up!


I LOVE it, that is very lovely. I now need to move house so I have somewhere suitable to hang something like this!
ReplyDeleteThis is such a cool idea! I love how you used the two different stains for contrast. what a statement piece! Have a great day!
ReplyDeleteI LOVE this. So simple, yet super original and makes a great statement piece. The stains you chose were perfect, too! Great work :)
ReplyDeleteThis is so stylin' ! I'm loving aztec right now. This would be awesome for an outdoor space too.
ReplyDeleteYay! I thought using the contrasting stains would help the cuts stand out. I'm so glad you like it!
ReplyDeleteThanks Erica!
ReplyDeleteI love this, really on trend for the season! I would love for you to link this up to the Be. YOU. tiful link party. Live on Thursday at 12am PST. Pinning!
ReplyDeleteWOW that is really cool - Thanks so much for showing the process!
ReplyDeleteThis is AMAZING! I'm so inspired. I'd love it if you'd link up to The DIY'ers! http://homecomingmn.blogspot.com/2014/06/diyers-5.html
ReplyDeleteLove how much of a statement this makes in your space and love the 2 tone. Thanks for sharing at The Makers.
ReplyDeleteLove this piece! Beautiful! Thanks for sharing with us at Your Designs This Time!
ReplyDelete