
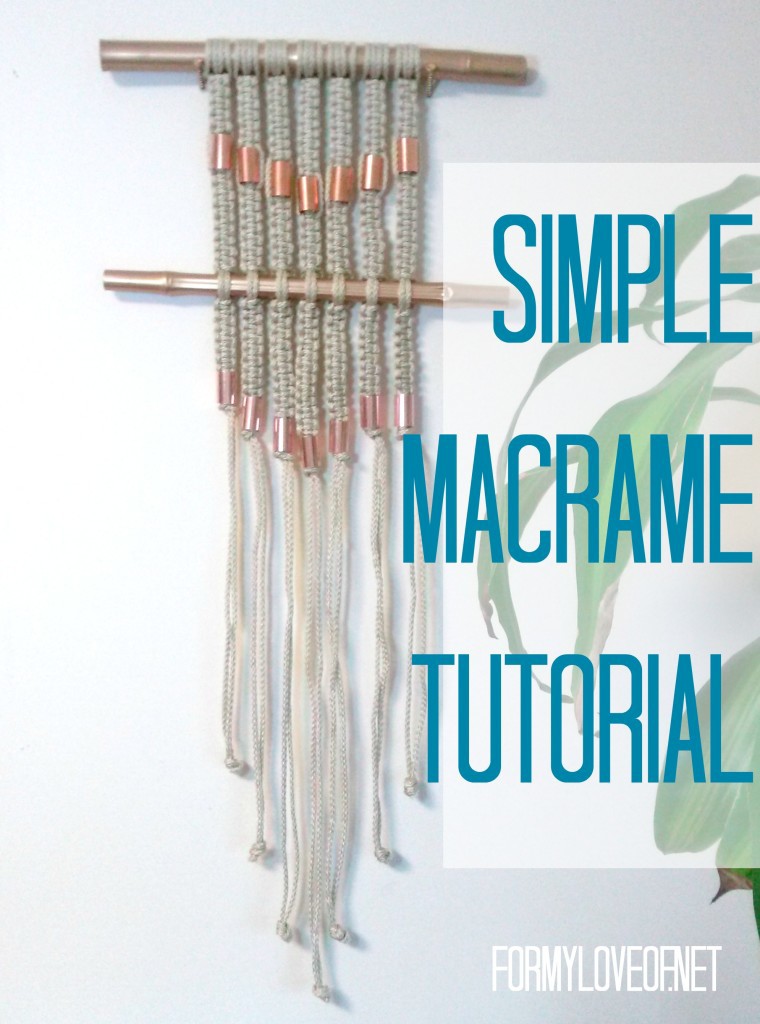
If you enjoy a blast from the past, the fun craft of macrame is for you. I grew up making hemp jewelry, so a lot of these knots are muscle memory that have finally found a name. Those were fun, carefree times. Now, I enjoy using those techniques to make decor for my walls. A simple way to get started is through this DIY Macramé Wall Hanging Tutorial:
Take your Macramé Cord and cut into 16 pieces about 2 arms-lengths long/Approximately 9 feet each. Fold each length of cord in half, lay the fold underneath the rod, pull the loop end up far enough to pull the two loose ends through the loop, and pull tight. Repeat with each of the 16 other pieces of cord. This cord is a bit slippery (the more I macrame, the more I don't recommend this particular cord. This one is fantastic), so they may slide out of their knot a bit, but will tighten once we get a couple knots going.
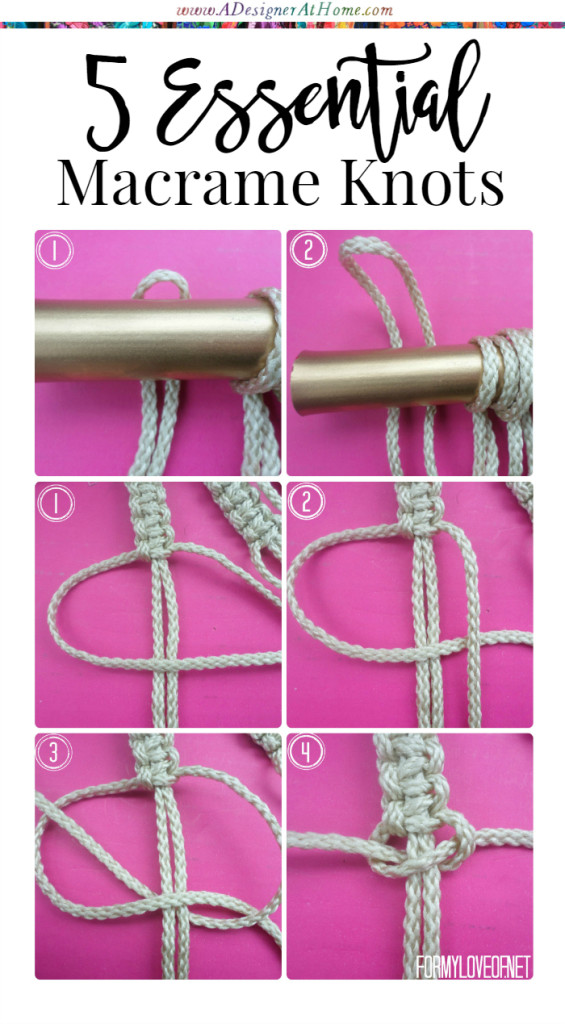
Once the cords are attached to your first rod, we'll begin square knots with groups of 4 strands of cord. Separate 4 cords starting from either end of your rod. Take the left most string and cross it overtop the middle two cords, loop the right most cord over top the left most string then behind the middle two cords, through the loop made by the left most cord, and pull tight. Alternate starting with left and right most cords to create flat knots.
There are many types of knots that are popular with Macrame Wall Hangings, but there are just a few that we'll be using to keep things simple and easy.
Eventually, the outer cords will run out before the inner cords do because we're using equal lengths of cord. Pull a large enough embellishment overtop a few knots and cut the outer cords so that they'll be hidden within the embellishment. Then tie a simple overhand knot to hold the embellishment in place.
For reference, I've included a chart with the number of knots in each length. This creates a small macrame wall hanging. The perfect size to start out with.
With the extra lengths of inner cords, tie overhand knots to mimic the arrow shape the embellishments create. This can be as far down the cord as what works for the space yours will live.
I hope you've enjoyed this simple macrame tutorial! Macrame is all about knots in various patterns. This simple macrame tutorial will help get your feet wet so you can go on to trying more elaborate pieces, like this one.
If you liked this tutorial, please share it with your friends!
You'll Need:
2 Rods (Bamboo, Dowel, Plumbing Pipes all make great bases!) I'm using leftover gold painted bamboo from a previous bamboo curtain rod project.
Macrame Cord
Embellishments ( Wood beads, Large nuts, pipe couplings, etc.) I'm using 14 Copper 1/2" couplings.
DIY Macramé Wall Hanging Tutorial
Take your Macramé Cord and cut into 16 pieces about 2 arms-lengths long/Approximately 9 feet each. Fold each length of cord in half, lay the fold underneath the rod, pull the loop end up far enough to pull the two loose ends through the loop, and pull tight. Repeat with each of the 16 other pieces of cord. This cord is a bit slippery (the more I macrame, the more I don't recommend this particular cord. This one is fantastic), so they may slide out of their knot a bit, but will tighten once we get a couple knots going.
Once the cords are attached to your first rod, we'll begin square knots with groups of 4 strands of cord. Separate 4 cords starting from either end of your rod. Take the left most string and cross it overtop the middle two cords, loop the right most cord over top the left most string then behind the middle two cords, through the loop made by the left most cord, and pull tight. Alternate starting with left and right most cords to create flat knots.
There are many types of knots that are popular with Macrame Wall Hangings, but there are just a few that we'll be using to keep things simple and easy.
When adding in embellishments, slide them over the center cords and tie your knot below to secure it in place.
To add an addition rod, run the outer cords underneath the rod and the inner two cords over top the rod. Then tie a square knot to secure it in place.
Eventually, the outer cords will run out before the inner cords do because we're using equal lengths of cord. Pull a large enough embellishment overtop a few knots and cut the outer cords so that they'll be hidden within the embellishment. Then tie a simple overhand knot to hold the embellishment in place.
For reference, I've included a chart with the number of knots in each length. This creates a small macrame wall hanging. The perfect size to start out with.
With the extra lengths of inner cords, tie overhand knots to mimic the arrow shape the embellishments create. This can be as far down the cord as what works for the space yours will live.
I hope you've enjoyed this simple macrame tutorial! Macrame is all about knots in various patterns. This simple macrame tutorial will help get your feet wet so you can go on to trying more elaborate pieces, like this one.
If you liked this tutorial, please share it with your friends!


Wow! this is very creative. How did you think of that? It's really great!
ReplyDeleteYour very talented. I would love for you to come over and link this up at
the MaMade Blog link up
http://www.thisolemom.com/2014/02/the-mamade-blog-hop-3.html
I'm pinning it and sharing!
Kim ~ This Ole Mom
Thank You Kim! I'll link up :)
ReplyDeleteI first heard about Macrame Wall Hangings from a tutorial on ABeautifulMess.com and collected my favorite Macrame Wall Hanging Inspiration and just went for it! It took a couple tries, but I figured it out!
I have never learned how to macrame. I think it is beautiful. Love this one... thank you for stopping by - following you through G+ Cathy
ReplyDeleteMan I was just thinking yesterday I haven't macramed in years and should make something and here you go! awesome!! Thanks for the inspiration, saving :) found from the pin it party
ReplyDeleteThis is super cute! Coming over from the linkup at TT&J.
ReplyDeleteThanks for stopping by Ashley! I'm glad you enjoy it!
ReplyDeleteThanks Cathy! Macrame can be as simple or as complex as you want it to be!
ReplyDeleteI bet a Macrame project would be stellar coming from you! Thanks for stopping by!
ReplyDeleteThis is so creative!! I love it! :) Thanks so much for linking the awesome tutorial up at the MaMade Blog Hop! Don't forget to stop back again next week to link up and see if you've been featured :)
ReplyDeleteThanks for the party! I'm glad you enjoy this little craft!
ReplyDelete[…] to ACT’s 3. Stephanie’s Pick: Felt Cookies from Munchkin and Bean 4. Kim’s Pick: DIY Macramé Wall Hanging Tutorial from For My Love Of Creating. Decorating. Rejoicing 5. Marla’s Pick: Gardening without a […]
ReplyDelete[…] ACT’s 3. Stephanie’s Pick: Felt Cookies from Munchkin and Bean 4. Kim’s Pick: DIY Macramé Wall Hanging Tutorial from For My Love Of Creating. Decorating. Rejoicing 5. Marla’s Pick: Gardening without a […]
ReplyDelete[…] to ACT’s 3. Stephanie’s Pick: Felt Cookies from Munchkin and Bean 4. Kim’s Pick: DIY Macramé Wall Hanging Tutorial from For My Love Of Creating. Decorating. Rejoicing 5. Marla’s Pick: Gardening without a […]
ReplyDeleteThat's so pretty! I've always wanted to give macrame a try! :)
ReplyDelete~ Christine
Thank you Christine! It can be really relaxing!
ReplyDeleteThis is so pretty! I've always admired the owl macrame hangings that I see online. This looks simple enough. Thanks for sharing!
ReplyDelete-Lara
The Owl Macrame Hangings are Epic! I wish I had the patience to learn how to make one. I'm glad you enjoyed this simple version, and thanks for stopping by!
ReplyDeleteWhat a great idea! Pinned :) Thanks for linking up to The Makers!
ReplyDeleteThanks for having me!
ReplyDeleteI love it!! It's simple but stunning. It would be perfect for an entry way.
ReplyDeleteWhat a great idea! If I had an entryway I would definitely put it there!
ReplyDeleteVery cool! I've been on a macrame kick lately, so this is a great tutorial and easy project for starters! A lot of what I've seen doesn't show you exactly how to create the knots. Great tut and creative decor!
ReplyDeleteI'm glad you found that part helpful! It was rather difficult trying to show the "hot-to" for the knots. Thank you so much for stopping by!
ReplyDelete[…] calculate it. But it is an awful big supplier of supplies for me. I bought the macrame for my Macrame Wall Hanging Tutorial from Amazon and the Sharpies for my West Elm Torres Wool Kilim Knock Off. I like the convenience of […]
ReplyDelete[…] remedy the problem, I wrapped macrame cord leftover from my DIY Macrame Wall Hanging around the ends of the pipes to make them fit snug into the PVC pipe. If I had more time to […]
ReplyDelete[…] remedy the problem, I wrapped macrame cord leftover from my DIY Macrame Wall Hanging around the ends of the pipes to make them fit snug into the PVC pipe. If I had more time to […]
ReplyDelete[…] can find the tutorial for the Simple Macrame Wall Hanging here, the DIY Leather Pillow instructions here, the plant is a Mass Cane, and the blanket is a throw […]
ReplyDelete[…] been trying to explore the macrame craft a bit more lately, shocking (i know). I made a simple macrame wall hanging a couple of months ago and I really wanted to try making a more intricate hanging that was much […]
ReplyDelete