

Hey Guys!
If you've been following me for a while, then you may remember the debut of the macrame lamps shades I made. The tutorial is up on Designer Trapped In A Lawyer's Body since I'm a contributor there. I just couldn't leave good enough alone though and I found myself inspired to change them up a bit. I love the look of hanging lamps, macrame and rustic decor. This will blend all of those elements in one perfect little lamp.
I'll briefly cover the actual macrame part here. If you'd like more details, I invite you to check out the original tutorial. Today's post will be focused moreso on how I changed the color of the rope, changed up the lamp cord and the rustic wall mount.
How to Make A Macrame Lampshade
I used a skinny and tall lamp shade that I purchased from Amazon to dissasemble and use the lamp rings from. It would be much cheaper to buy the lamp parts individually though. The only reason I think it would benefit to use an actually assembled lamp is because you could cut away the liner as you macrame to act as a guide for length. But mine still ended up a bit crooked so I would definitely say it would make best sense to buy the 2 lamp rings from a lamp making supplier.
The top ring has a smaller ring in the center to attaching to a lamp base. I used my dremel to cut a chunk of that out so I wouldn't have to take the prefabricated lamp wire apart to fit it through.

The start of the macrame is to knot two larks head knots beside one another onto the top ring. Then a square knot (step by step diagram below under the braided lamp cord section).

Split the four strings in half and gather them with bundles beside this knot. Knot a square knot about 2 inches down. Alternate back and forth between bundles of rope to create this particular woven design. I hope the bad "highlighting" job in the picture below is helpful in understanding what I'm trying to get across rather than just confusing!

Once the desired length of shade is acheived, wrap the excess rope onto the bottom ring.

DIY Paint Dip-Dye
A trick I like to use in decorating a space with a pop of color is to use the paint in multiple places. Yeah, I've got a coral door and coral in the wall hanging beside my dresser. They even play off the pink quartz crystal drawer knobs I have on my nightstands, the boho hand print hanging above the thrifted art and a beautiful orange and red pillow I keep in the space. But, I wanted to pull in the color in the bedside lamps. I did not want to straight paint the wood or rope. So I thought I'd experiment with turning the paint into a "dye."
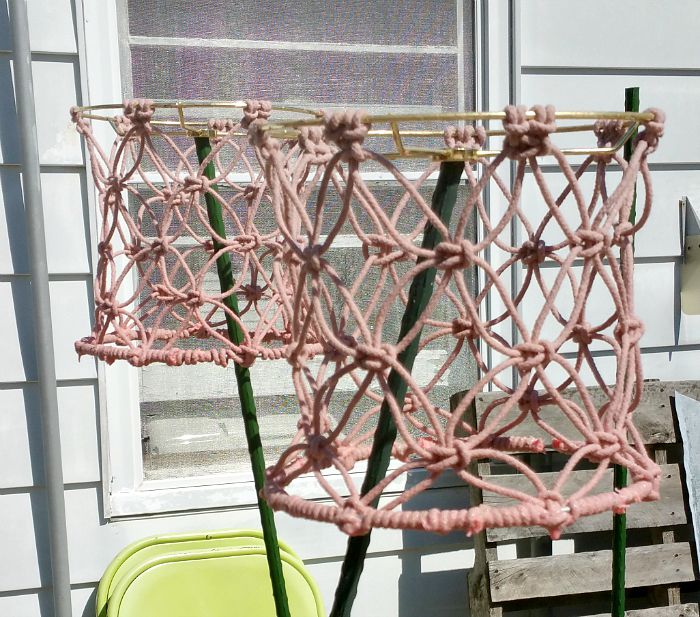
This actually turned out to be really easy and successful. The ratio seems to depend on which finish and brand of paint you use- but I think you'll be able to get it right easily. I poured a dollop of paint into a large bowl. Then I ran water into the bowl and mixed the paint and water together. I kept adding water until the water was still opaque, but just as liquidy as plain water.
Then I pressed the shades into the water and soaked for a few moments. I looked a little white trash afterwards as I hung them to dry in garden stakes over dead plants (the struggle is real ;)). Once they were dry, I slipped them back onto the lamp cord. Easy!


Braided Lamp Cord
The lamp cord I used with these sconces are basic and boring, but they're inexpensive, premade and from Amazon- So they were the go to for me. The longer the lamps hung there though, the more I knew I needed to do something with the actual lamp cord to make it me. So I took a huge roll of jute twine and essentially square knotted my brain numb. It is absolutely time consuming, but the result is too rewarding for me to have quit or vow never to do it again. I will absolutely be doing this again and again. If you're not familiar with macrame, or maybe you just know what I mean by "square knot," I've included this easy to follow image guide below. I was in a rush to get this project done, so I just wrapped the other cord with the jute, no fancy knots, and it looks very cool, too!

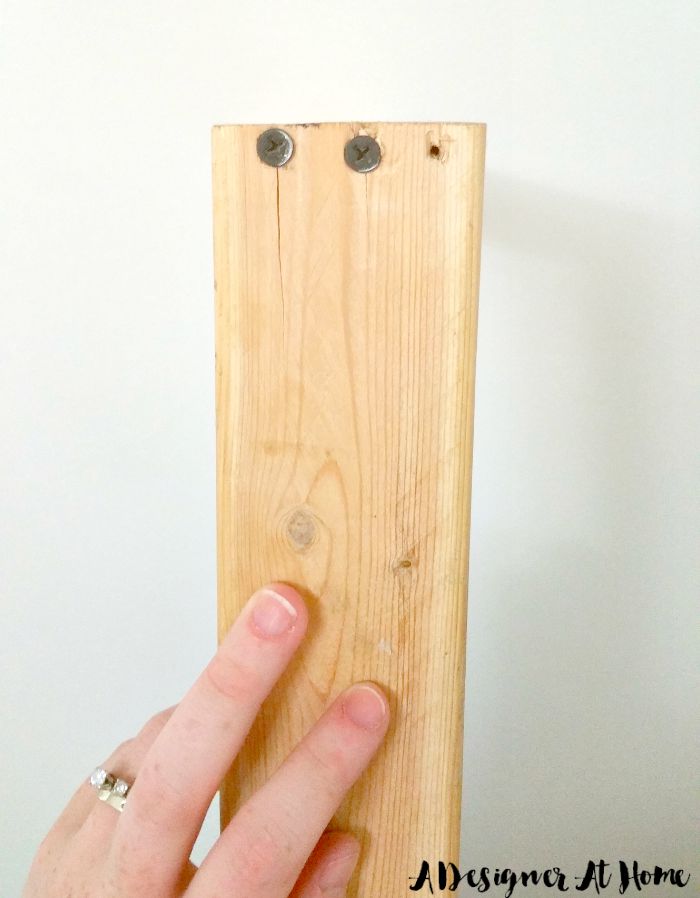
Rustic Wall Mount
The wall mounted portion is just as easy as everything else I've shared so far. I took two pieces of wood, one that would cover the previously drilled holes from the first round using shelf brackets and take the lamps up a bit higher and the other needed to be long enough to hold the lamp away from the wall with room to wrap the cord. These measurements can be however long or short you want. In fact, I think it would make a beautiful base for any kind of hanging lamp. Apply a little bit of wood clean between the two pieces of wood, then use wood screws to attach them. For added stability, install an L bracket. With a few supplies (most DIYers would have these laying around and if not they're super inexpensive!), you have an easy and beautiful hanging lamp base. You could then paint it, leave it plain, or stain it (that's the route I chose).
|  |  |
Essentially you'd just have to piece together the portions you like, or all of them, to achieve a boho-rustic hanging lamp. I'm a fan of color, so these perfectly speak to my soul. But if you're not a color fan, simply omit the dip dye. If you're not a fan of macrame (what!? kidding!) use a different lamp shade. I want you to take something you enjoy from this tutorial and make it work for you. I hope you do find it helpful and cool. Thanks a ton for stopping by, and be sure to take a look at some of the other posts here on A Designer At Home, because they're pretty awesome ;)


this is SO amazing! i love it, corinna! you are so talented!
ReplyDeleteSuch a great idea and so different. Love!
ReplyDeleteThank you!
ReplyDeleteWow that is really clever!! You have some serious knot tying abilities there chica. ;)
ReplyDeleteThank you friend!
ReplyDeleteOM...FREAK! This is gorgeous! Love it! Pinning.
ReplyDelete*super big smile emoji*
ReplyDelete